Create a New Position: Start
A&P/Classified/Teacher/Librarian
Take me to the Create a New
Position section of HRMS. ![]()
Help sections available for the Create a New Position process for an A&P/Classified/Teacher/Librarian position:
Start | General | Salary/Funding | Purpose/Functions | Qualifications | Working Conditions | Justification | Recruiting | Document Review
The Create a New Position process enables you to create and route A&P/Classified/Teacher/Librarian position-related documents. You can access this section from the HRMS Home page or from a link on the top right side of the Browse Positions page.
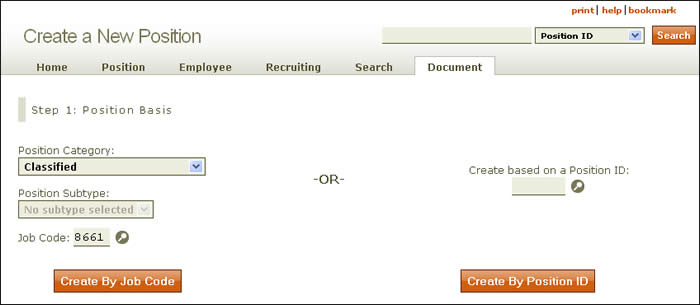
- The Create a New Position page lets you create a position by job code or by position ID.
- By job code:
- Use the drop-down menu to choose the A&P/Classified/Teacher/Librarian position category. Subtypes are not available for this position type, so the corresponding menu will remain grayed out.
- Enter a job code, using the lookup
 as needed.
 - Click Create By Job Code.
- By position ID:
- Enter a position ID, using the lookup as needed.
- Click Create By Position ID.
- Enter a position ID, using the lookup
- By job code:
- HRMS takes you to the second screen in sequence, as shown here.
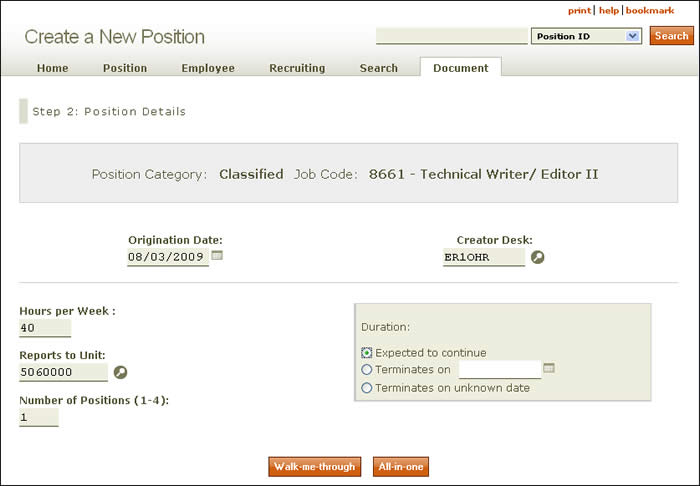
- The origination date defaults to the current date; however, you can change it by clicking the calendar icon or by entering the date manually using the MM/DD/YYYY (month/day/year) format. This date is the first day an incumbent may be assigned to the position.
- Next, enter the position’s hours per week.
- Provide the reports to unit number, using the lookup as needed.
- Enter the number of positions you wish to create, four being the maximum.
- The Creator Desk refers to the authorization (desk) assigned to the user who is creating the document. Click the lookup to select the appropriate Creator Desk for the document. This desk serves two functions: First, any user with this desk authorization can make updates to the document while it is in Created status and can approve it to route forward. Second, this desk in combination with the owning unit code and account(s) assigned to the position will determine routing for the document.
NOTE: The field will pre-populate and may need to be changed. You can type in the desk name or click the lookup icon to select a different Creator Desk. - Identify the duration of the faculty position: Expected to continue, Terminates on ______ (enter a date in MM/DD/YYYY format or use the calendar icon), or Terminates on unknown date.
- Click either Walk-me-through or All-in-one.
- The Walk-me-through option takes you through the document section by section.
- If you select the All-in-one option, all sections in the Create a New Position document appear in a single scrolling page.
IMPORTANT: When an HRMS document is created, you cannot update certain fields once you select Walk-me-Through or All-in-one. To ensure your position is set up as intended, carefully consider the information entered in the following fields before leaving the start page:
- Job Code
- Hours per Week
- Origination Date
- Duration
- Number of Positions
- Are you ready to recruit now?
- An expanded page appears that confirms the data you entered, identifies whether recruiting is required or optional, and asks, Are you ready to recruit now?

- If you originally selected that you did not want to recruit but changed your mind, wait until the Create a New Position document has been final approved. Then, select the Position tab and then the Details tab. Select the Recruit link. This will begin the Recruit and Fill a Position process. Route your document forward to create a job posting.
- If you originally selected that you want to recruit but changed your mind, include a note on the document indicating that you do not want to recruit at this time. Document notes are accessible from the summary information at the top of the document. Your Staffing and Career Management Services representative will view this note and cancel the posting. To ensure your recruitment cancellation, please contact your SCMS representative directly.
If you select Yes, the Recruit section along with other data specific to recruiting will be included in the document. Selecting No will create a position and allow you to recruit at any time after final approval of the Create a New Position document.
NOTE: When deciding whether or not to recruit for a A&P/Classified/Teacher/Librarian position, be aware that your answer cannot be changed during the Create a New Position process. However, there are two ways to change the recruiting option after completing a Create a New Position document:
- If you wish to hire a UTemp to the A&P/Classified/Teacher/Librarian position prior to or during the recruitment period, check the box provided. A UTemp representative will contact the document creator.
- Click Walk-me-through or All-in-one once more to go to the Create a New Position: General section.
Take me to the Create a New Position section of HRMS. ![]()